Introduction
Welcome to the world of limitless possibilities where artificial intelligence meets human creativity! In this blog, we embark on an exciting journey to explore the fusion of cutting-edge technologies – WatsonX AI and Llama 2 – with the versatility of Python programming. Have you ever envisioned creating an interactive question-answer system that not only responds but generates nuanced and contextually relevant answers? Look no further!
Today, we dive deep into the realm of AI-driven innovation, unraveling the step-by-step process of building a powerful command-line interface (CLI) tool capable of generating dynamic responses to user queries. By leveraging the robust capabilities of WatsonX AI and the specialized knowledge encoded within the Llama 2 model, we’re set to revolutionize how we interact with AI systems.
Whether you’re an AI enthusiast, a seasoned developer, or simply curious about the potential of artificial intelligence, this blog is your gateway to unleashing the full potential of WatsonX AI and Llama 2. Join us as we embark on this exhilarating journey, where creativity knows no bounds, and every question sparks a new adventure in AI innovation.
Setup and API Keys
- Create an IBM Watson account. You can create a free trial account by going to https://eu-de.dataplatform.cloud.ibm.com/wx/home?context=wx
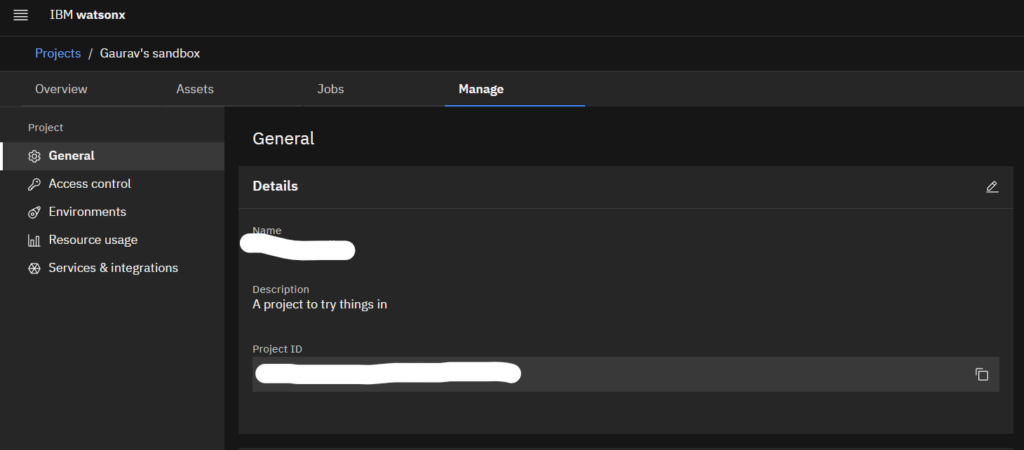
- Get your Project ID –
- To get your Project ID, click on the project and navigate to the manage tab, there you can find the Project ID (like in the picture below)
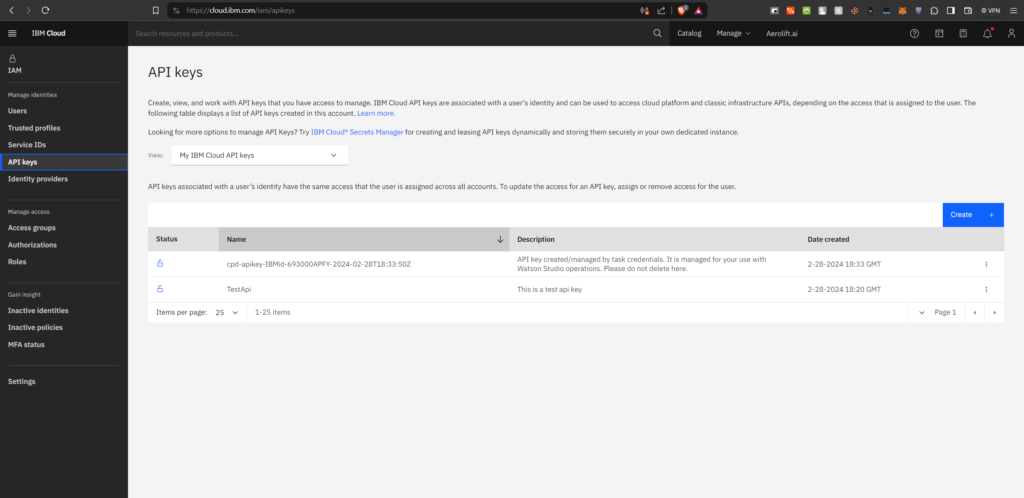
- Now, get your Access (IMA) API keys
- To get IMA API keys, click on Navigation menu and then select the Access (IMA) option. It will redirect you to the IMA page.

- Now in the IMA page navigate to API Key section.
- Create a new API key, and save it.
Install Requirements
- Install the IBM Cloud cli, this can be done from the following link https://cloud.ibm.com/docs/cli?topic=cli-install-ibmcloud-cli
- Or use one of the following command
For Windows,
iex (New-Object Net.WebClient).DownloadString('https://clis.cloud.ibm.com/install/powershell')For Linux,
curl -fsSL https://clis.cloud.ibm.com/install/linux | shFor Mac,
curl -fsSL https://clis.cloud.ibm.com/install/osx | sh- Install the IBM Watson python sdk with the following command
pip install --upgrade ibm-watsonYou can read more about it at https://github.com/watson-developer-cloud/python-sdk
To Make a Simple GenAI Q&A Pipeline
Generate your bearer token, with the following curl command:
curl -X POST 'https://iam.cloud.ibm.com/identity/token' -H 'Content-Type: application/x-www-form-urlencoded' -d 'grant_type=urn:ibm:params:oauth:grant-type:apikey&apikey=YOUR_API_KEY'You can use the following python code to generate your simple QNA Pipeline (use you API key, Project ID and Bearer token)
import json
import requests

def watson():
	question = input("Enter a question: ")
	prompt = "generate response as answer and follow-up-questions"

	url = "https://eu-de.ml.cloud.ibm.com/ml/v1-beta/generation/text?version=2023-05-29"

	body = {
		"input": f""" <YOUR_DATA>
	Question: {question} {prompt}
	Answer:""",
		"parameters": {
			"decoding_method": "greedy",
			"max_new_tokens": 200,
			"min_new_tokens": 50,
			"repetition_penalty": 1
		},
		"model_id": "meta-llama/llama-2-70b-chat",
		"project_id": "YOUR_PROJECT_ID"
	}

	headers = {
		"Accept": "application/json",
		"Content-Type": "application/json",
		"Authorization": "Bearer <YOUR_ACCESS_TOKEN>"
	}

	response = requests.post(
		url,
		headers=headers,
		json=body
	)

    if response.status_code != 200:
        raise Exception("Non-200 response: " + str(response.text))
    else:
        data = response.json()
        generated_text = data['results'][0]['generated_text']
        print(generated_text)


watson()